How to sew darts perfectly for clothing or bag making
Learning how to sew darts in fabric is an essential sewing skill no matter whether you want to sew clothing or bags. Darts are much more commonly sewn in clothing to mould the fabric to the curves of the body, but darts can also be very useful in bag-making, to turn flat cloth into a shape with volume to give space inside your bag. In this article I’ll share with you my easy tips for how to sew darts.
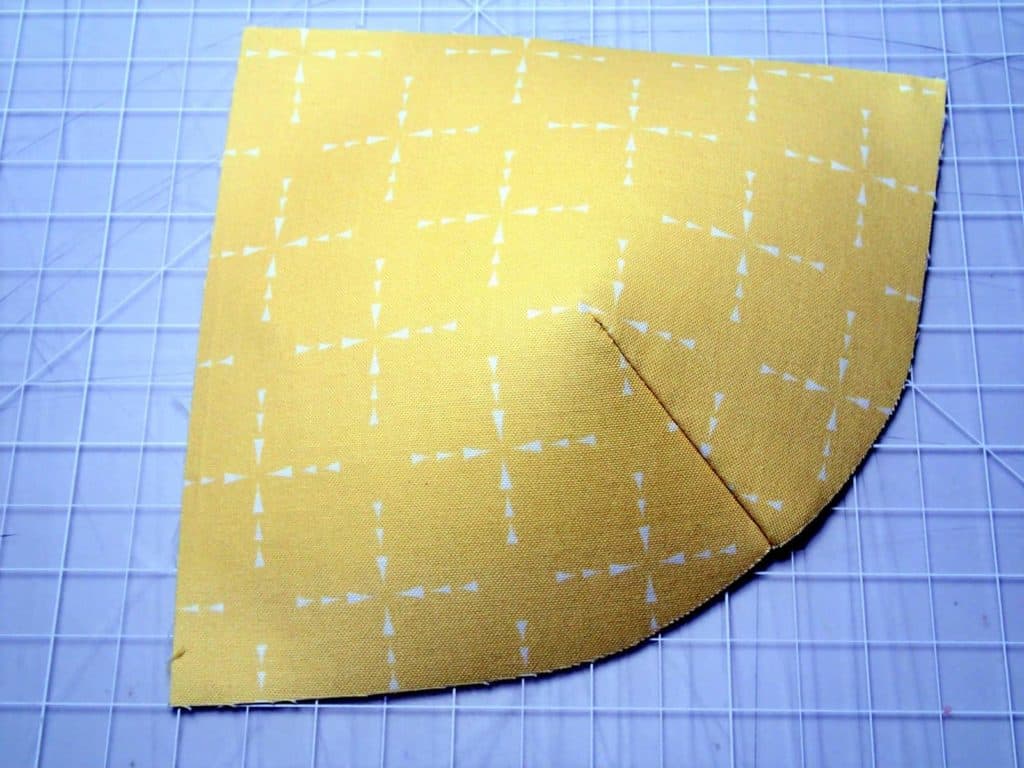
Darts are most commonly found in pairs so that the shape created is symmetrical. They are usually triangular in shape with straight ‘legs’ but some darts can be curved in clothing design and some can be shaped like a diamond, for example at the waist. As we are a bag-making site, we’ll just deal with the most common type of dart with straight legs as they might be used for bags and purses.
How to transfer darts to your fabric
Designers usually take great care in the placement and design of darts as the shaping created is important to the finished design. Therefore, it is important to accurately mark the placement of the darts on your fabric so they can be sewn correctly. As darts are usually balanced and in pairs, things would look odd if they weren’t in the right place or weren’t the right size. There are two ways you might want to transfer the dart markings accurately to the reverse of your fabric.
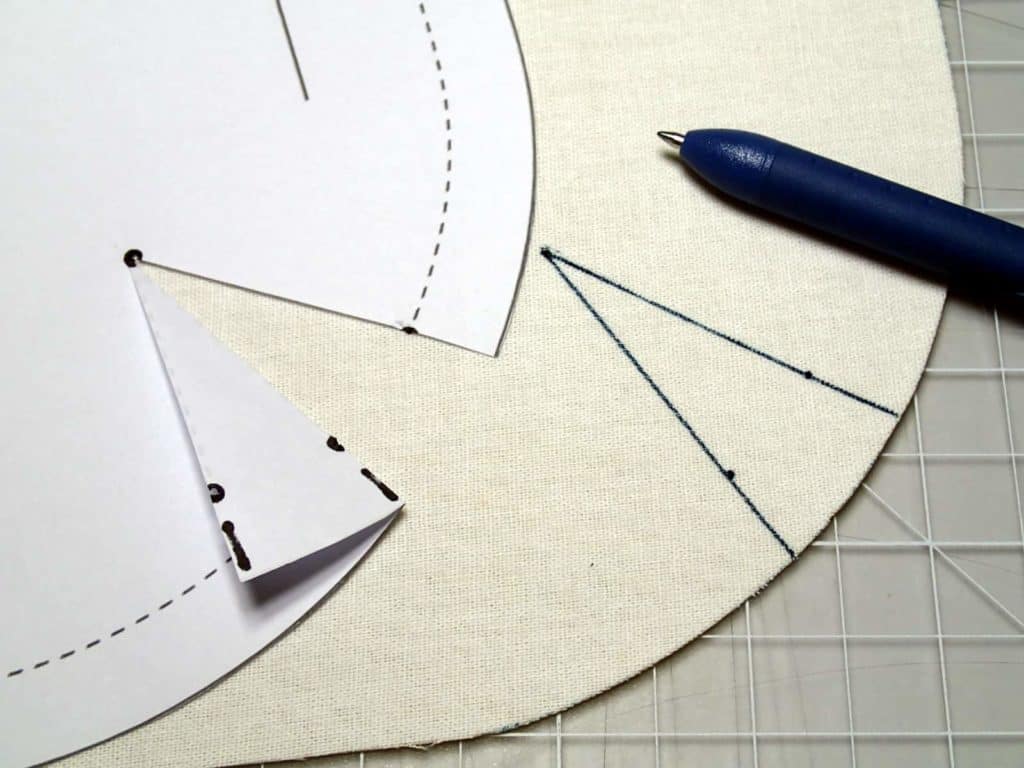
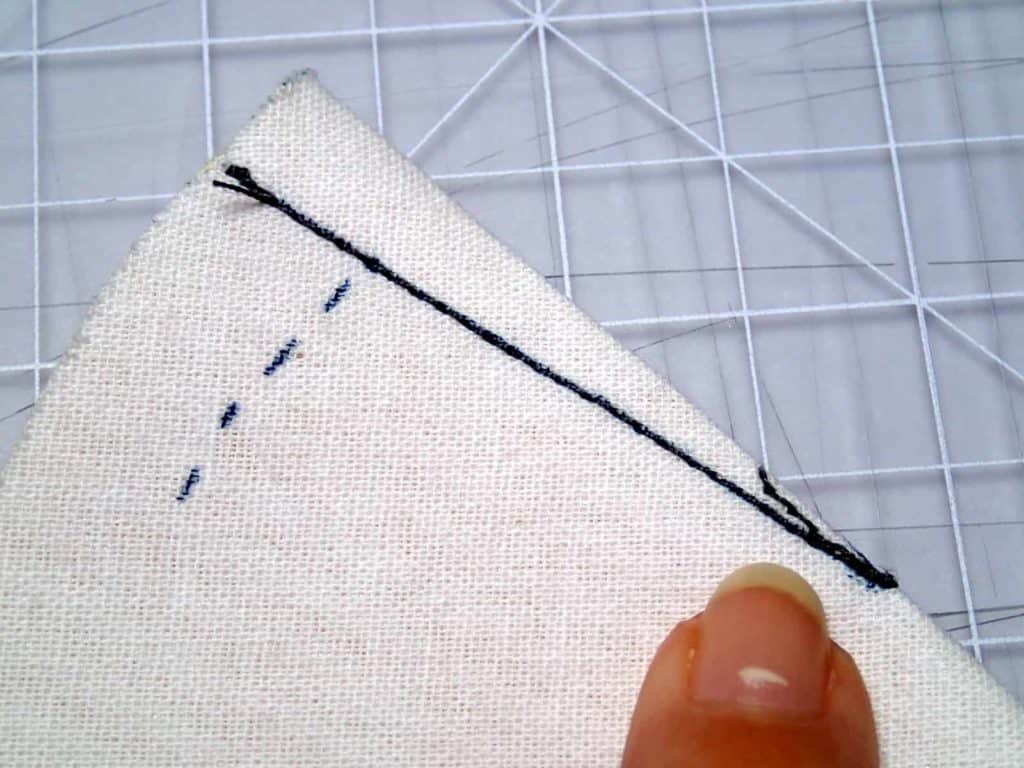
1 – three points or holes. Your dart is basically a triangle made of straight lines, so we can accurately mark out these lines by marking the three points of the triangle. (There are other shapes of darts such as curved darts, diamonds etc but those are more for garment sewing and aren’t covered expressly in this article.)
Use an awl or other small pointy tool to make a hole in your pattern at the point of the dart. If your pattern piece has a seam allowance or stitching line marked, you can also make small holes where the dart legs cross that stitching line. If there is no stitching line marked, you can make a small slit in the edge of the pattern piece where the dart legs hit the cutting line.
In the example below, I have marked the three holes you would make in the pattern and also the two slits.
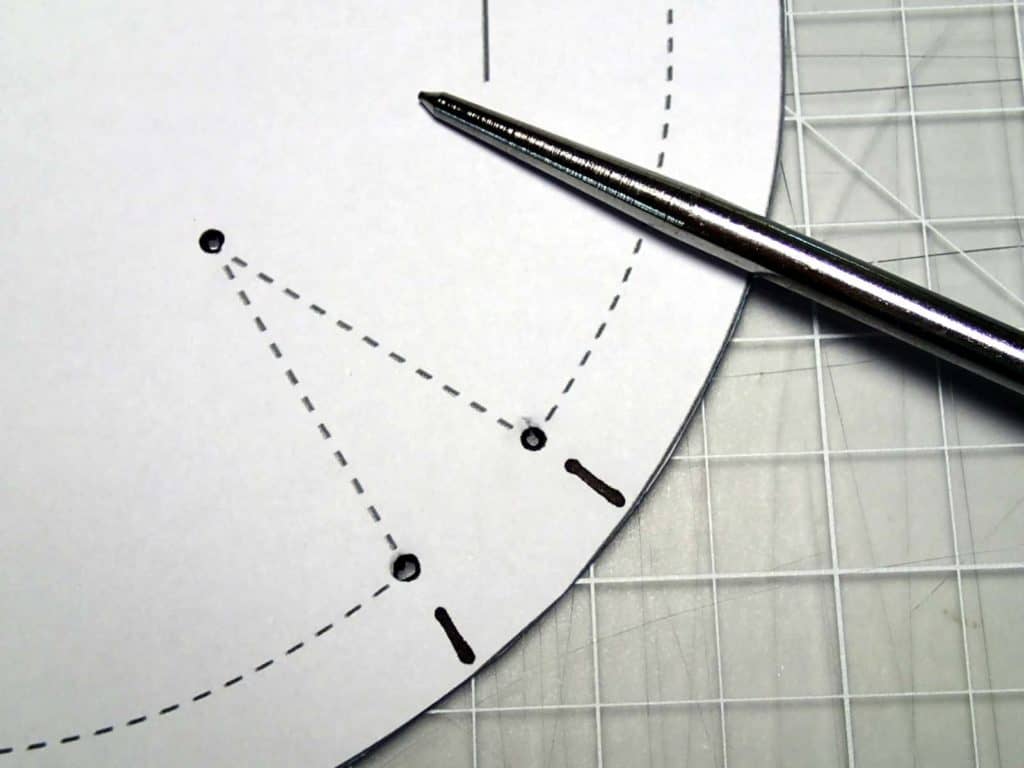
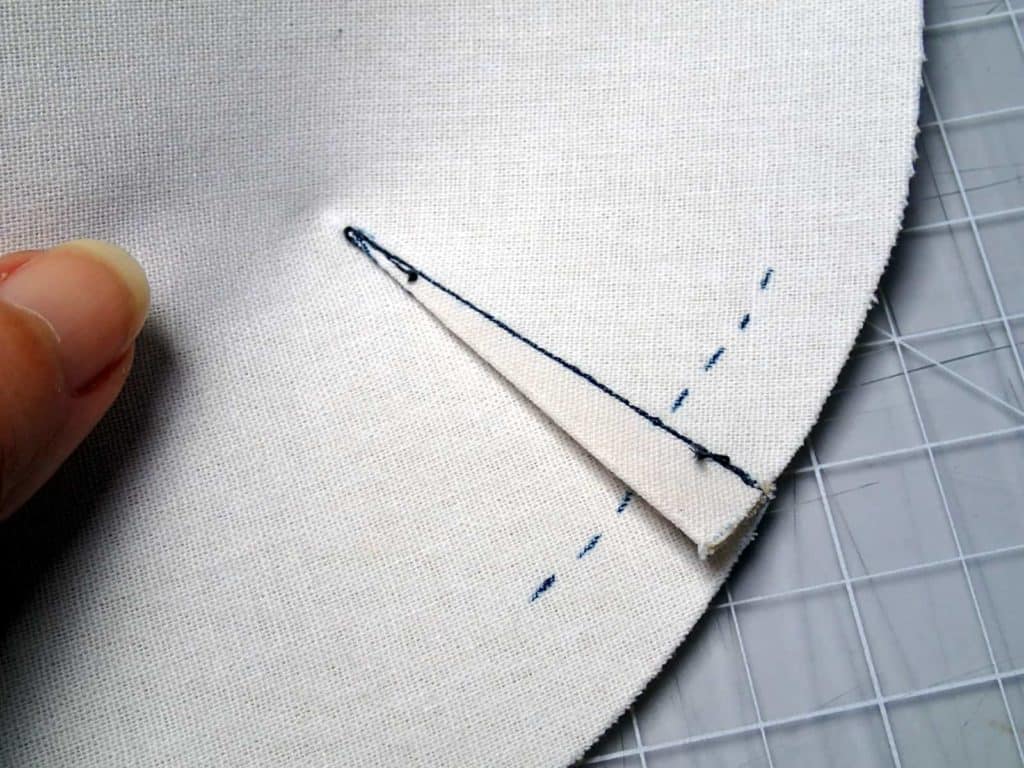
Place your pattern piece carefully on the reverse of your fabric and line up the edges. Now use a fabric marker to mark the wrong side of your fabric at the point of those three holes, or the one hole at the point and the two slits. Lift the pattern piece and make sure you can see those three marks on your fabric.
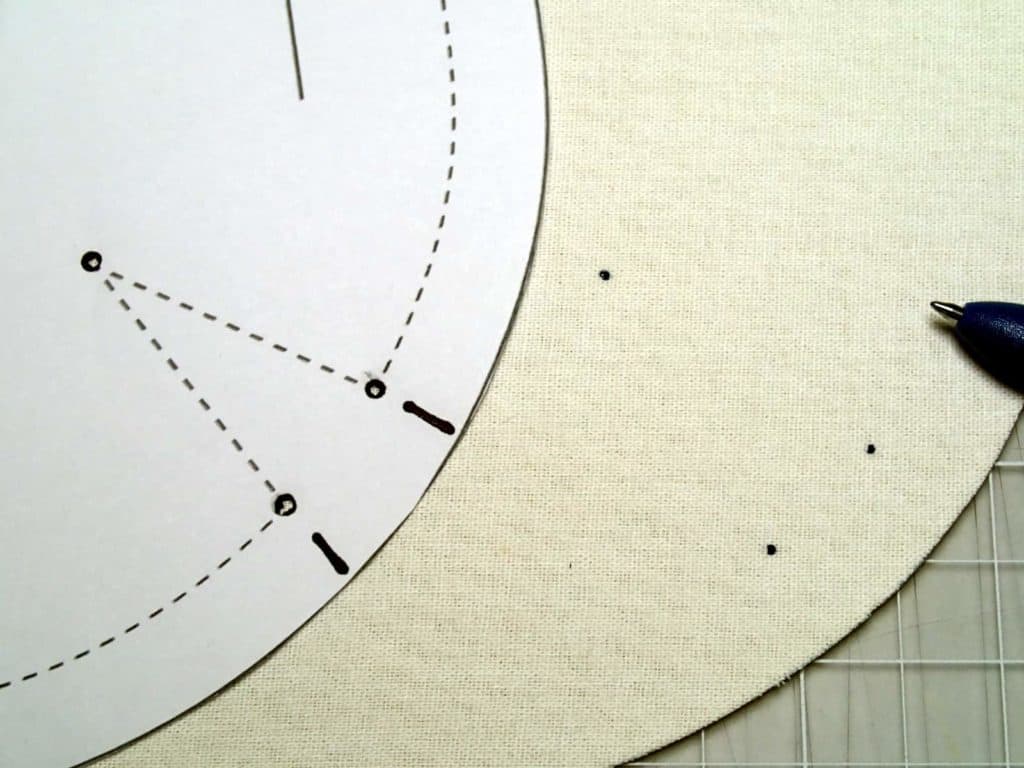
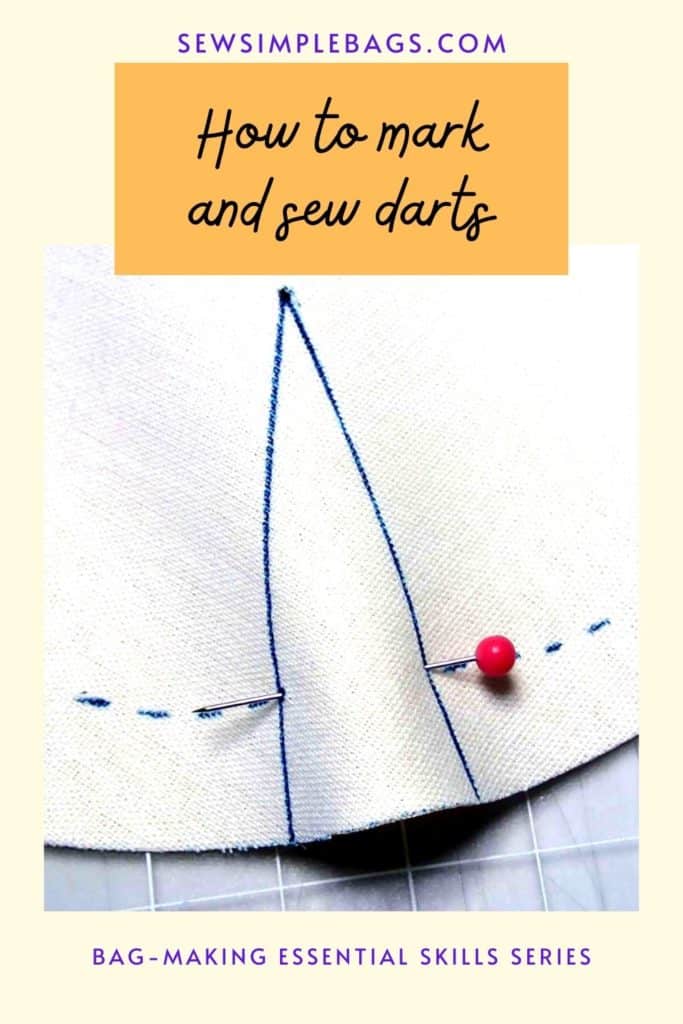
Use a fabric marker and ruler to join up the dots and you have accurately marked your dart lines.
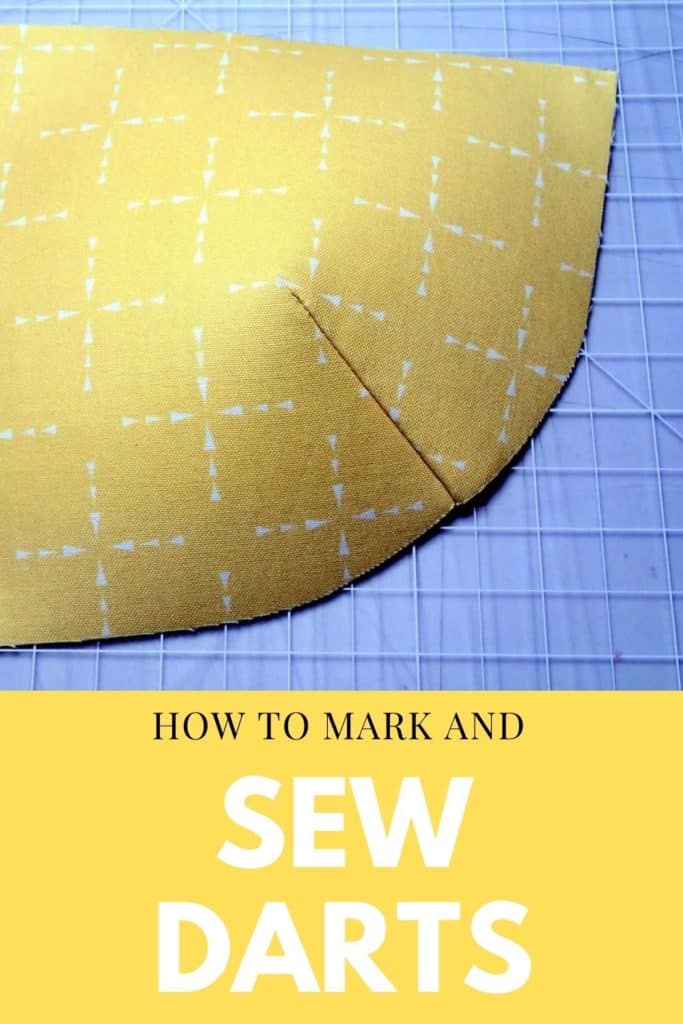
2 – cut out the dart. Another way to mark the dart placement on your fabric would be to cut the dart out of the pattern piece. Again, there are two methods of doing this. A – cut the dart out completely along the dart legs to leave a hole in the pattern. B – cut just one of the dart legs and then fold the pattern back along the second dart line. This gives the same result, however, the pattern can be folded back down again and taped back in place easily if you want to use this pattern piece again in future.
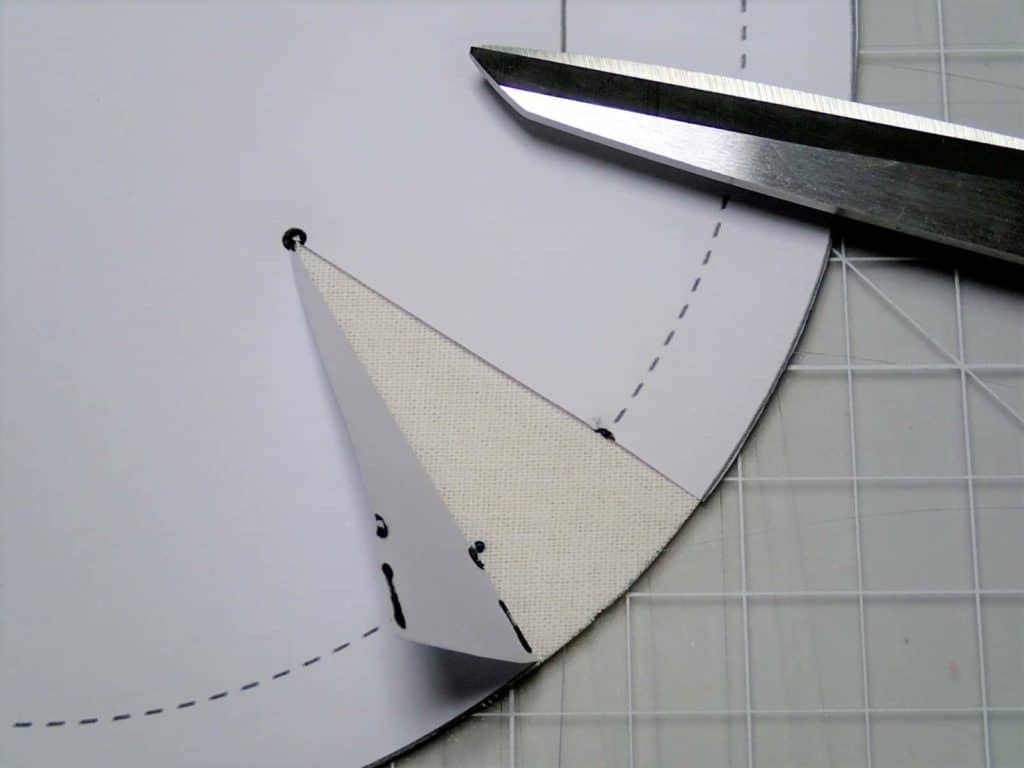
Place your pattern piece carefully on the reverse of your fabric and line up the edges. Now use a fabric marker to draw the dart in place on the wrong side of your fabric – it’s easy this way!
How to pin darts
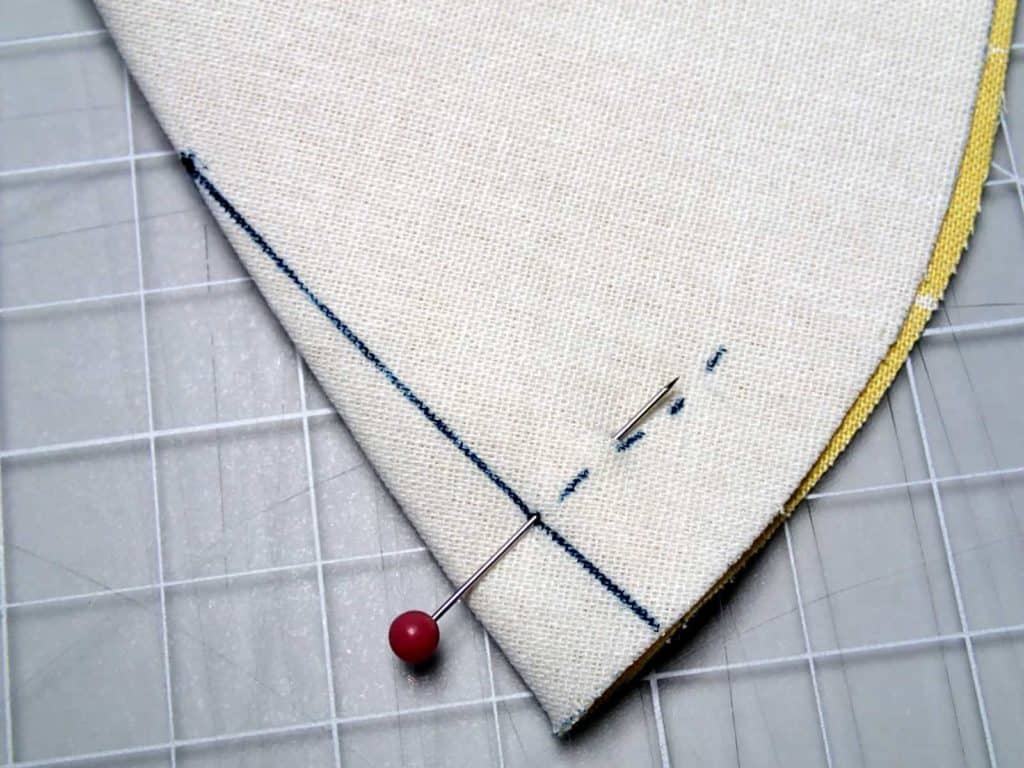
If you want to get an accurate result when you sew darts (and you should), then you will definitely need to pin them carefully before sewing. I always start by sticking a pin through one of those marked holes at the botton of the dart, where the dart and the seam line cross.
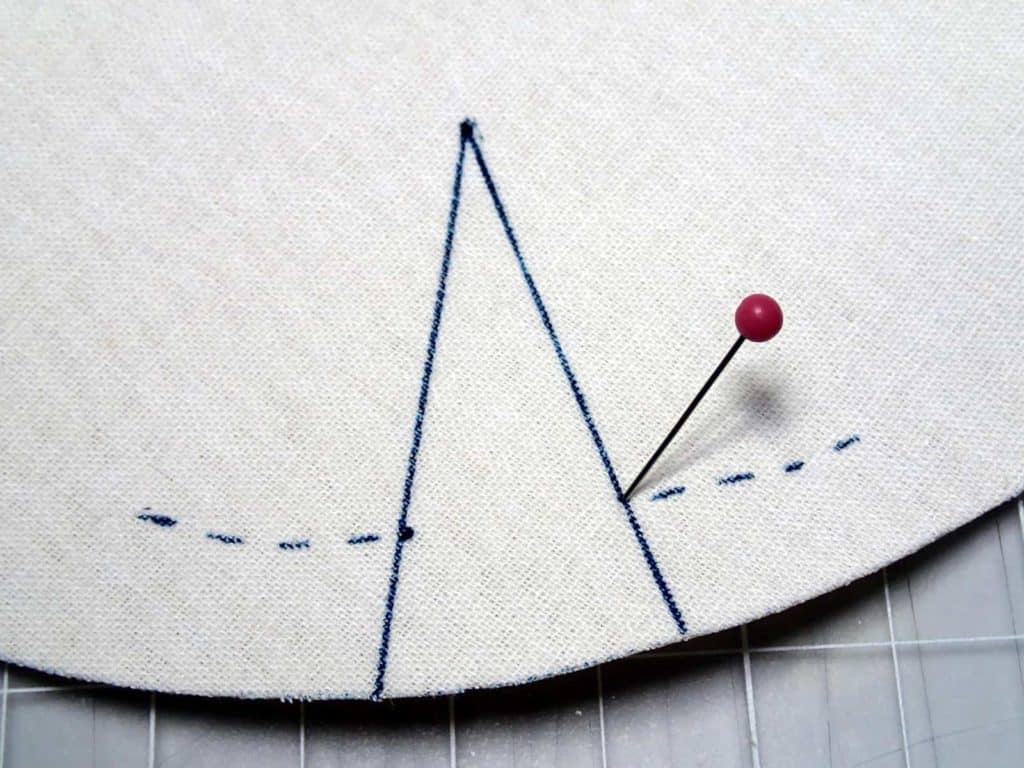
Stick a pin through from the wrong side, then fold the fabric right sides together and stick the pin back through the mark on the other side of the dart. Press the fabric together and the pin makes sure those two points are exactly on opposite sides to one another.
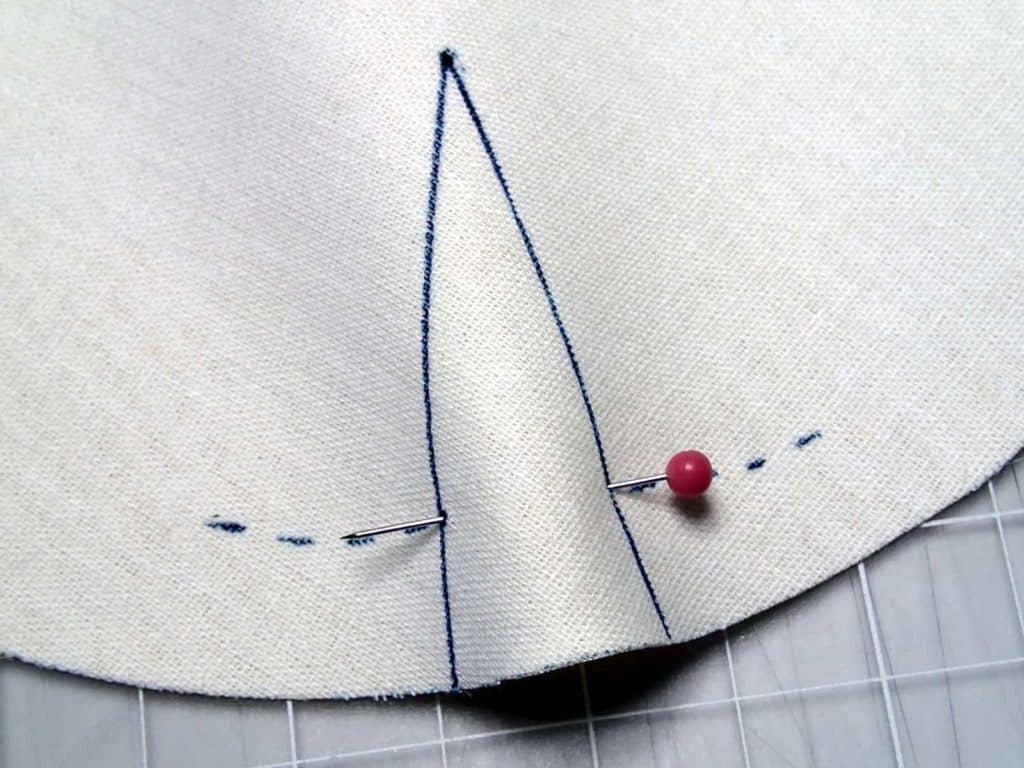
Now fold the fabric exactly through the point of the dart. OK, now you have the dart folded exactly in half.
So without removing the pin, put the point through more or less where the seam allowance is and this is what you end up with. One dart that is folded perfectly in half, through the point of the dart and both legs are exactly on top of each other.
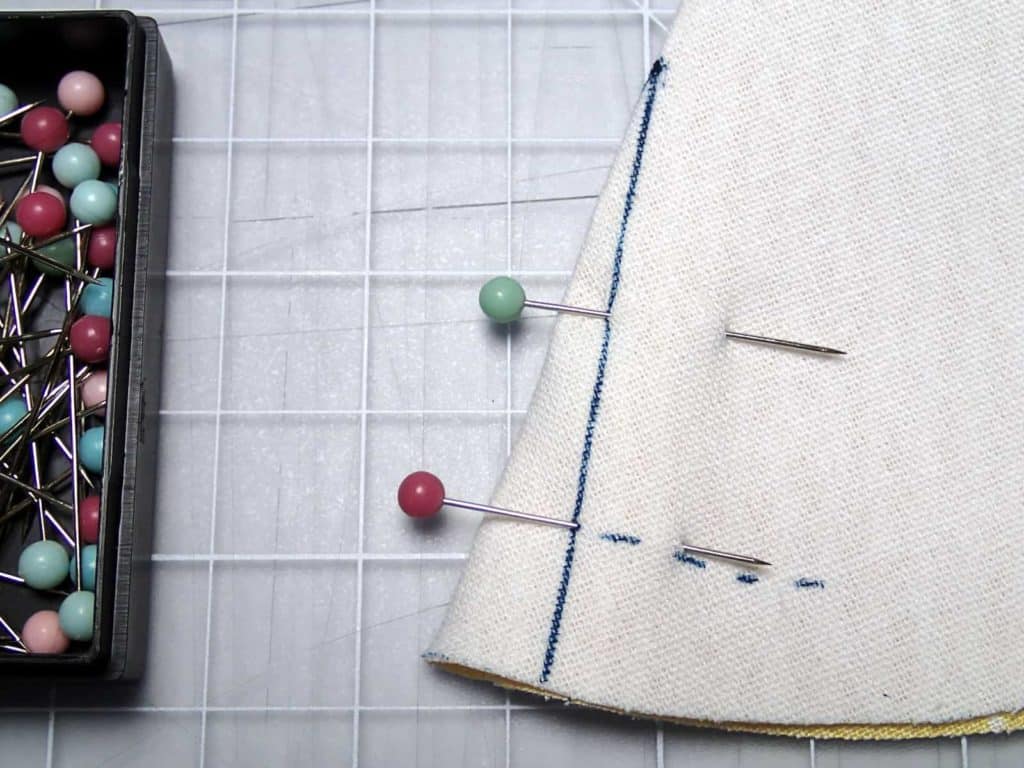
Now you can add a second pin if it’s a long dart and things might shift. You have two choices. 1 – Pin along the dart. Stick your pin in and out of the leg of the dart and make sure it exactly pierces the line on the reverse too. Adjust your fold a little if you need to.
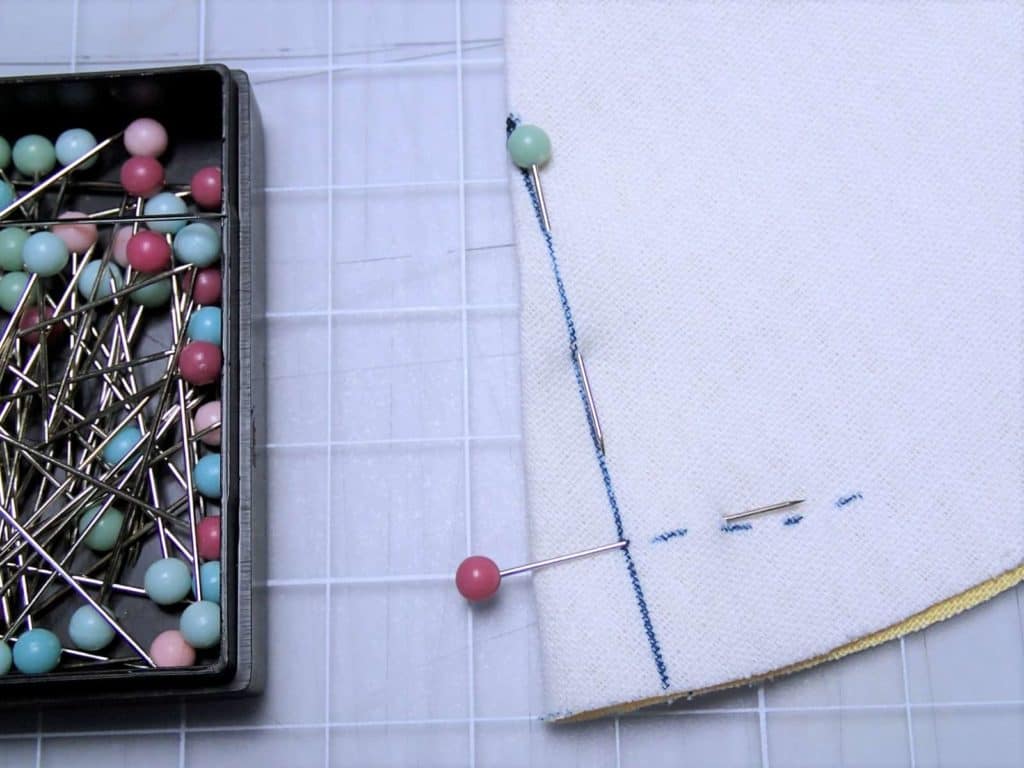
2 – Pin through the dart with one or two pins depending on length. Pin through from one side and check the back that the pin pierces the line on the reverse too. This method is probably best because your pins are perpendicular to your line of sewing and you can sew up very close to the pin before you have to remove it. But sewers choice on that; do what seems easiest to you.
Which direction should you sew a dart
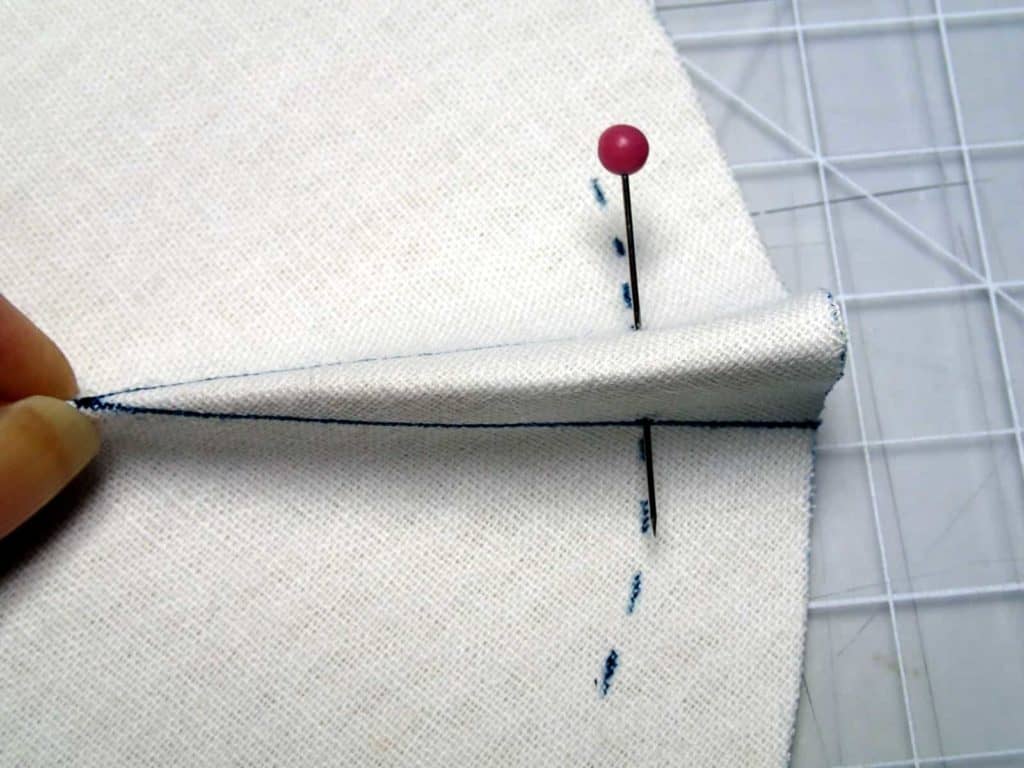
Always start sewing at the open end of the dart where it is widest and sew towards the point. Trying to start sewing right on the point at the very edge of the fabric probably won’t be easy or give you a nice point to your dart when seen from the right side.
How to sew darts
Always back stitch when you start sewing a dart. Having gone to sew much trouble, you don’t want to risk those stitches coming undone. Sew from the open end of the dart towards the point. Start using a regular stitch length (2.5mm) and as you sew, you will be sewing closer and closer to the folded edge of the fabric.
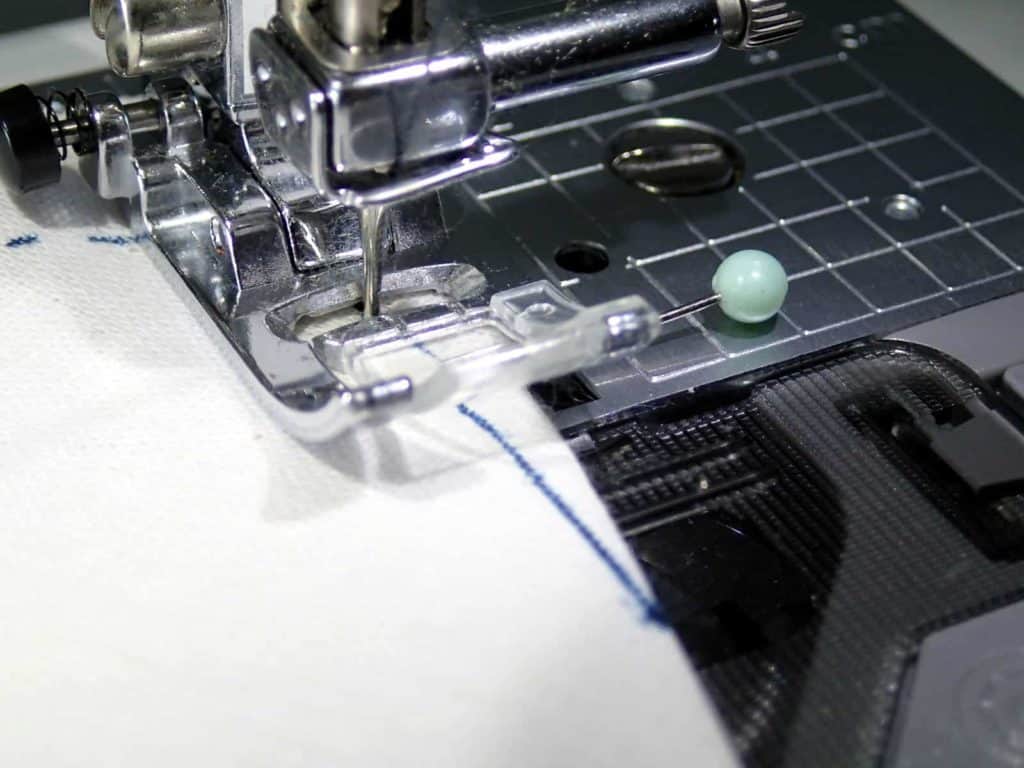
Slow your stitching as you approach the point (known as the apex of the dart). You’ll need to sew carefully. In clothing, you would usually sew your last couple of stitches right on the edge of the fabric before sewing off the end without backstitching. This gives you the most perfect result and is highly recommended for sewing darts in clothes, especially those that end at the bust apex. You’ll then tie off your thread ends to secure your stitches.
For bag-making, this isn’t so critical, and I usually DO sew a couple of backstitches at the apex of my dart, backstitching into the part of the dart that is close to the fold. This just gives the tip of the dart extra strength and I can be sure it’s not coming undone. You can still tie off the ends of your thread. For bag-making, I think that’s completely acceptable. Call me a cheat, that’s fine 🙂
How to press darts
Your sewing pattern will usually tell you the direction to press your darts. In clothing, darts most often are pressed with gravity, and will be pressed down. Vertical darts that run from head to toe are usually pressed to the sides of the body, i.e. outwards from the centre, although in sewing circles, opinions vary on this.
In bag-making, you will often need to ‘nest’ your darts in the seams, for example when sewing the front of the bag to the back. In the front your darts might be pressed down and in the back they would be pressed up. Then when your darts come together at the seam, they fold in opposite directions in your seam allowance and are easier to sew.
Take care when pressing the end of your dart. You don’t want to press it flat as you might end up with a pleat or pucker in your fabric. Instead curve your fabric as you press and just use the nose or tip of the iron at the point of the dart to help it keep a curved shape.
NOTE – you don’t often cut the dart and press it open. It’s not that sort of seam and trying to get a good finish at the point would be difficult as there just isn’t enough fabric there and your fabric would likely fray and open. It can be an option on thick and bulky fabrics where pressing to one side might be very visible from the outside of the garment.
Now you’ve learned all about how to sew darts for making bags and purses, I hope you will give my Oxford Purse pattern a try. The darts give it a really nice rounded shape I think you’ll love and it’s very forgiving if they aren’t perfect 🙂 Check it out in the shop.
Download this article as a PDF
This article has been converted to a print-friendly PDF file to make downloading, saving and printing it easy. Any videos in the article still work. It’s available for optional purchase for your convenience.
Please help me to share this article
Please PIN this article to your sewing boards on Pinterest using the large image at the top of this article or one of these below. It would also make my day if you would share in your Facebook sewing groups. Thank you.